InAdream

Few months ago I participated in the making of a short film that blended live action and CG environments. The project is born in a pub in front of some beers, fusing inspiration, passion and, of course, alchool. They needed someone taking care of the CG work and I needed experience in the production’s pipeline. So it all began and after a few months of hard work, inspiration, discussions and inevitable delays “In a dream” saw the light.
A bus on the bridge
Initially I had 2 tasks: texturing and shading of an old bus and a desolated bridge, all in a perfect decadent british style. “Quite a challenge old boy”.
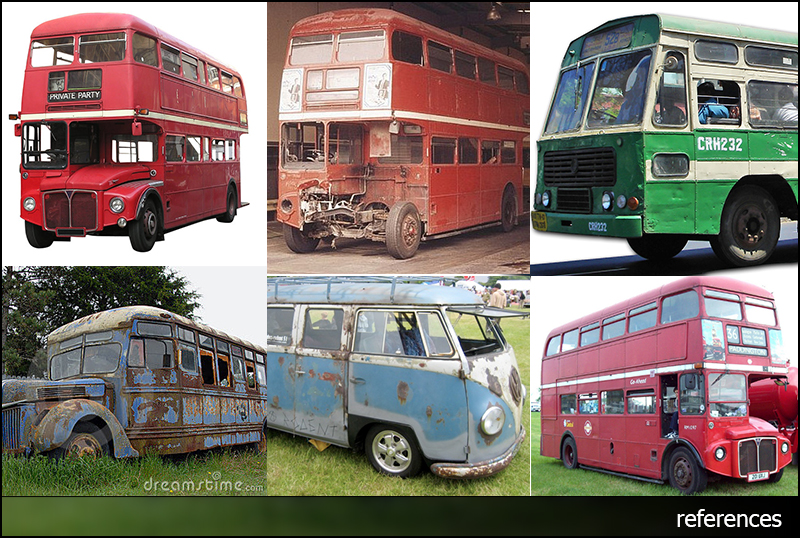
The models were ready, so I started the research of references that I could use to create all the textures of the objects and most of all to give them the status of used and aged by time.
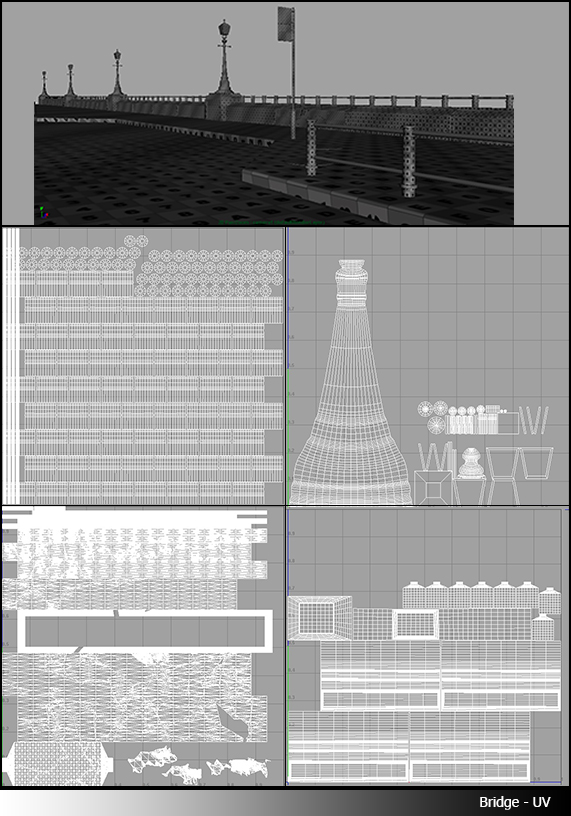
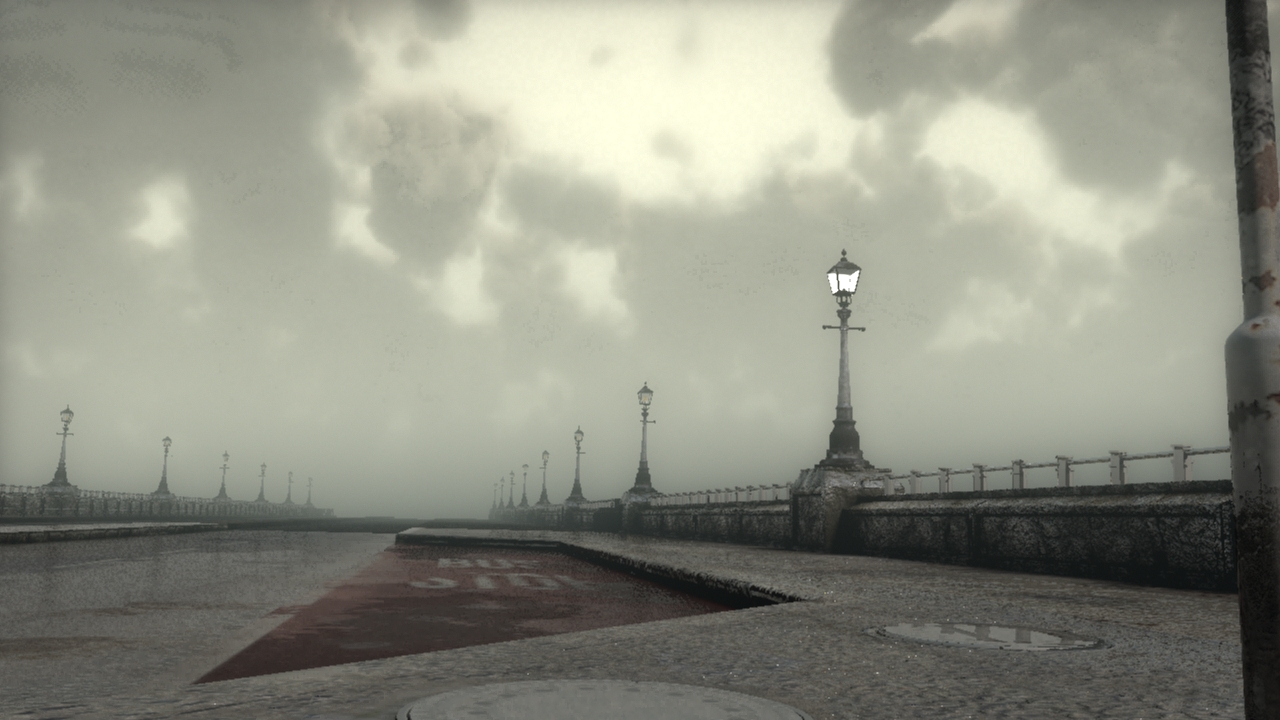
The bridge was the main setting and had to be surrounded by the fog and illuminated by a soft and diffuse daylight filtered by clouds and lamp posts along the edges.

UV Mapping, Texturing and Shading
UV Mapping
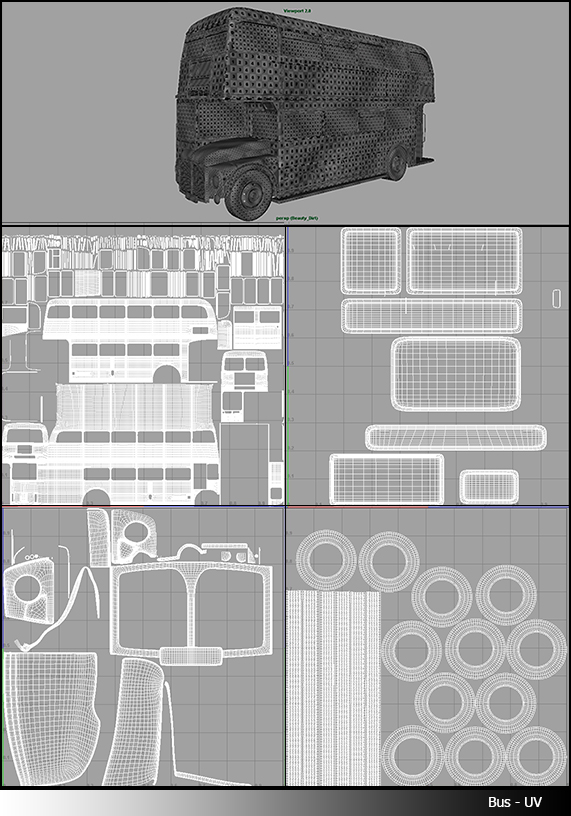
After some research I started to work on the 3D. Where to start? UV of course.The Bus and the bridge had to be seen from several angles so every part had to be mapped correctly. I started from the bus, creating several UV layouts, separating the exterior from the interior part and creating different layouts based on material.
Same for the bridge separating the road and walkway from parapets, lamp posts and handrails.
Probably the longest part but that gave me great flexibility to focus more details where needed and gave me the possibility to bake the occlusion pass and use it in the texturing process. A great advantage for detailing textures.
Texturing
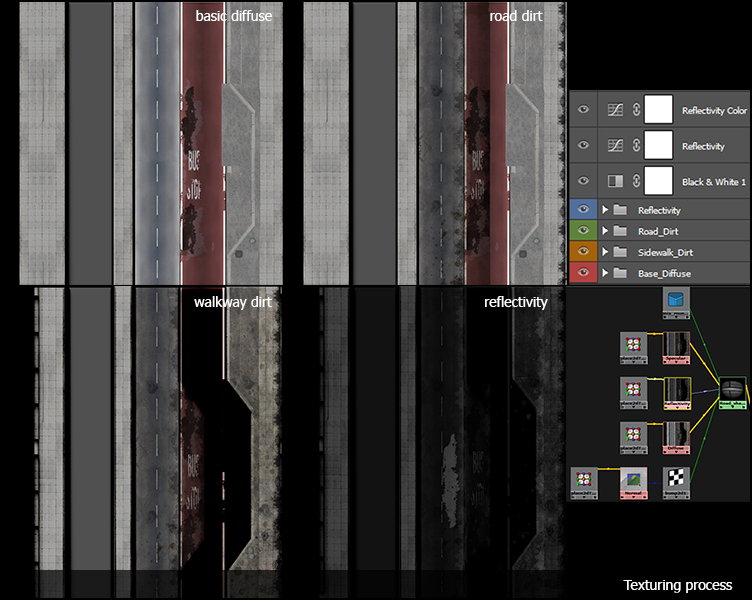
Once the UV layouts were ready I started to bake the occlusion and bring the result with an instance of the uv map in photoshop to start the texturing process.
Basically the principle was : define the base colour of the object, overlay a pattern (where required) and multiply over the occlusion. This gave me a basic and clean version of the diffuse texture of the objects.
Later I created a library of dirt, scratches, splatter patterns that helped me to give the aged result.
In the end almost every material was defined by Diffuse, Specular, Reflectivity and Normal/Bump.
Sculpting, bump and normal maps
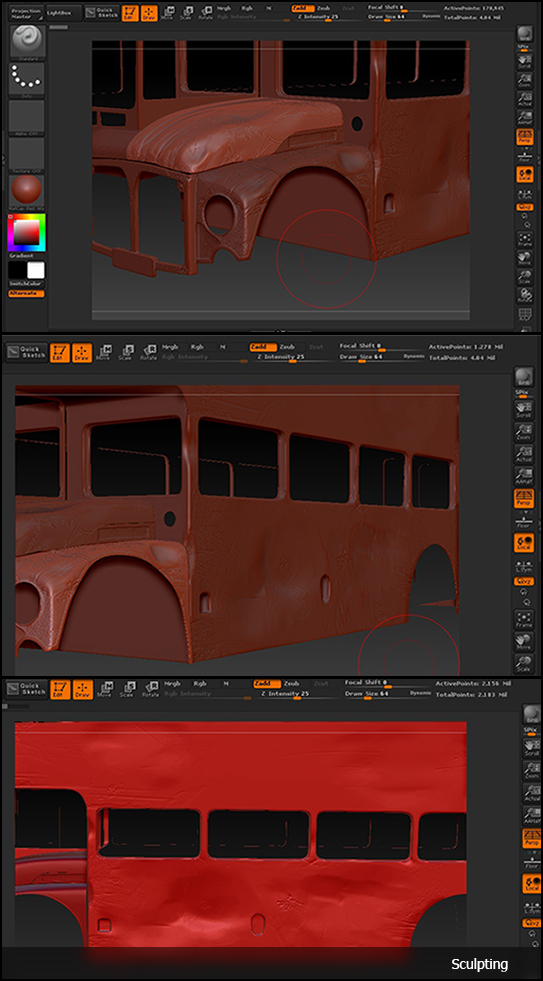
To give a more realistic and detailed look at the objects I used Zbrush for creating normal and bump maps. It gave me the possibility to speed up the process of ageing adding details and usury in specific places working in a 3D environment.
Lighting and Rendering
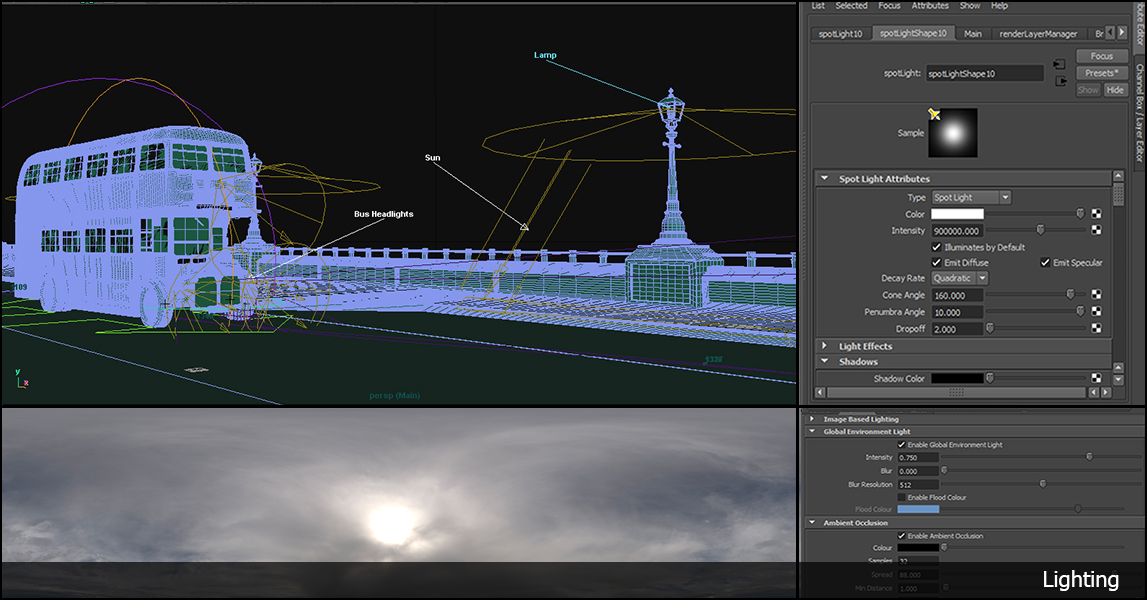
Lighting
Once the shading and texturing part was completed I had to deal with two new tasks: Lighting and Rendering. The second task was a bit tricky, since I had to provide a disassembled version of what we call “beauty pass”. Several pieces that the compositor put together. In this way the compositing work had the possibility to rework and re- define every single aspect of the final render, not last the matching with the live footage.
I separated the lighting process in 2 sections: the environment light (sun and lamp posts) and the Bus lights, plus some fill lights to better define volumes and shade of the scene.
I defined the environment light in a simple way: a directional light simulating the sun and hdr image to give all the indirect illumination coming from sky/clouds. The result had to be very diffuse with soft shadows.
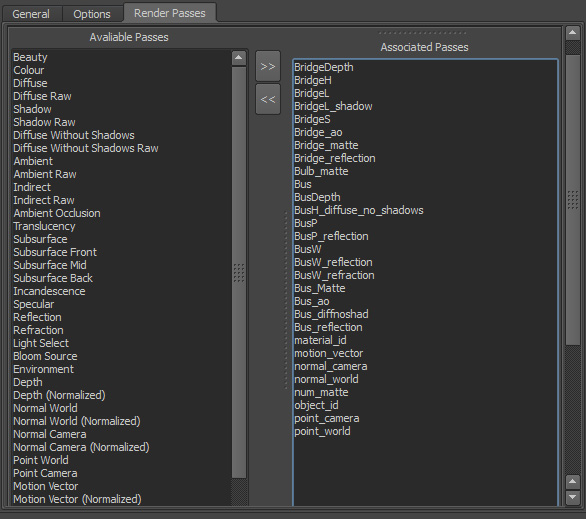
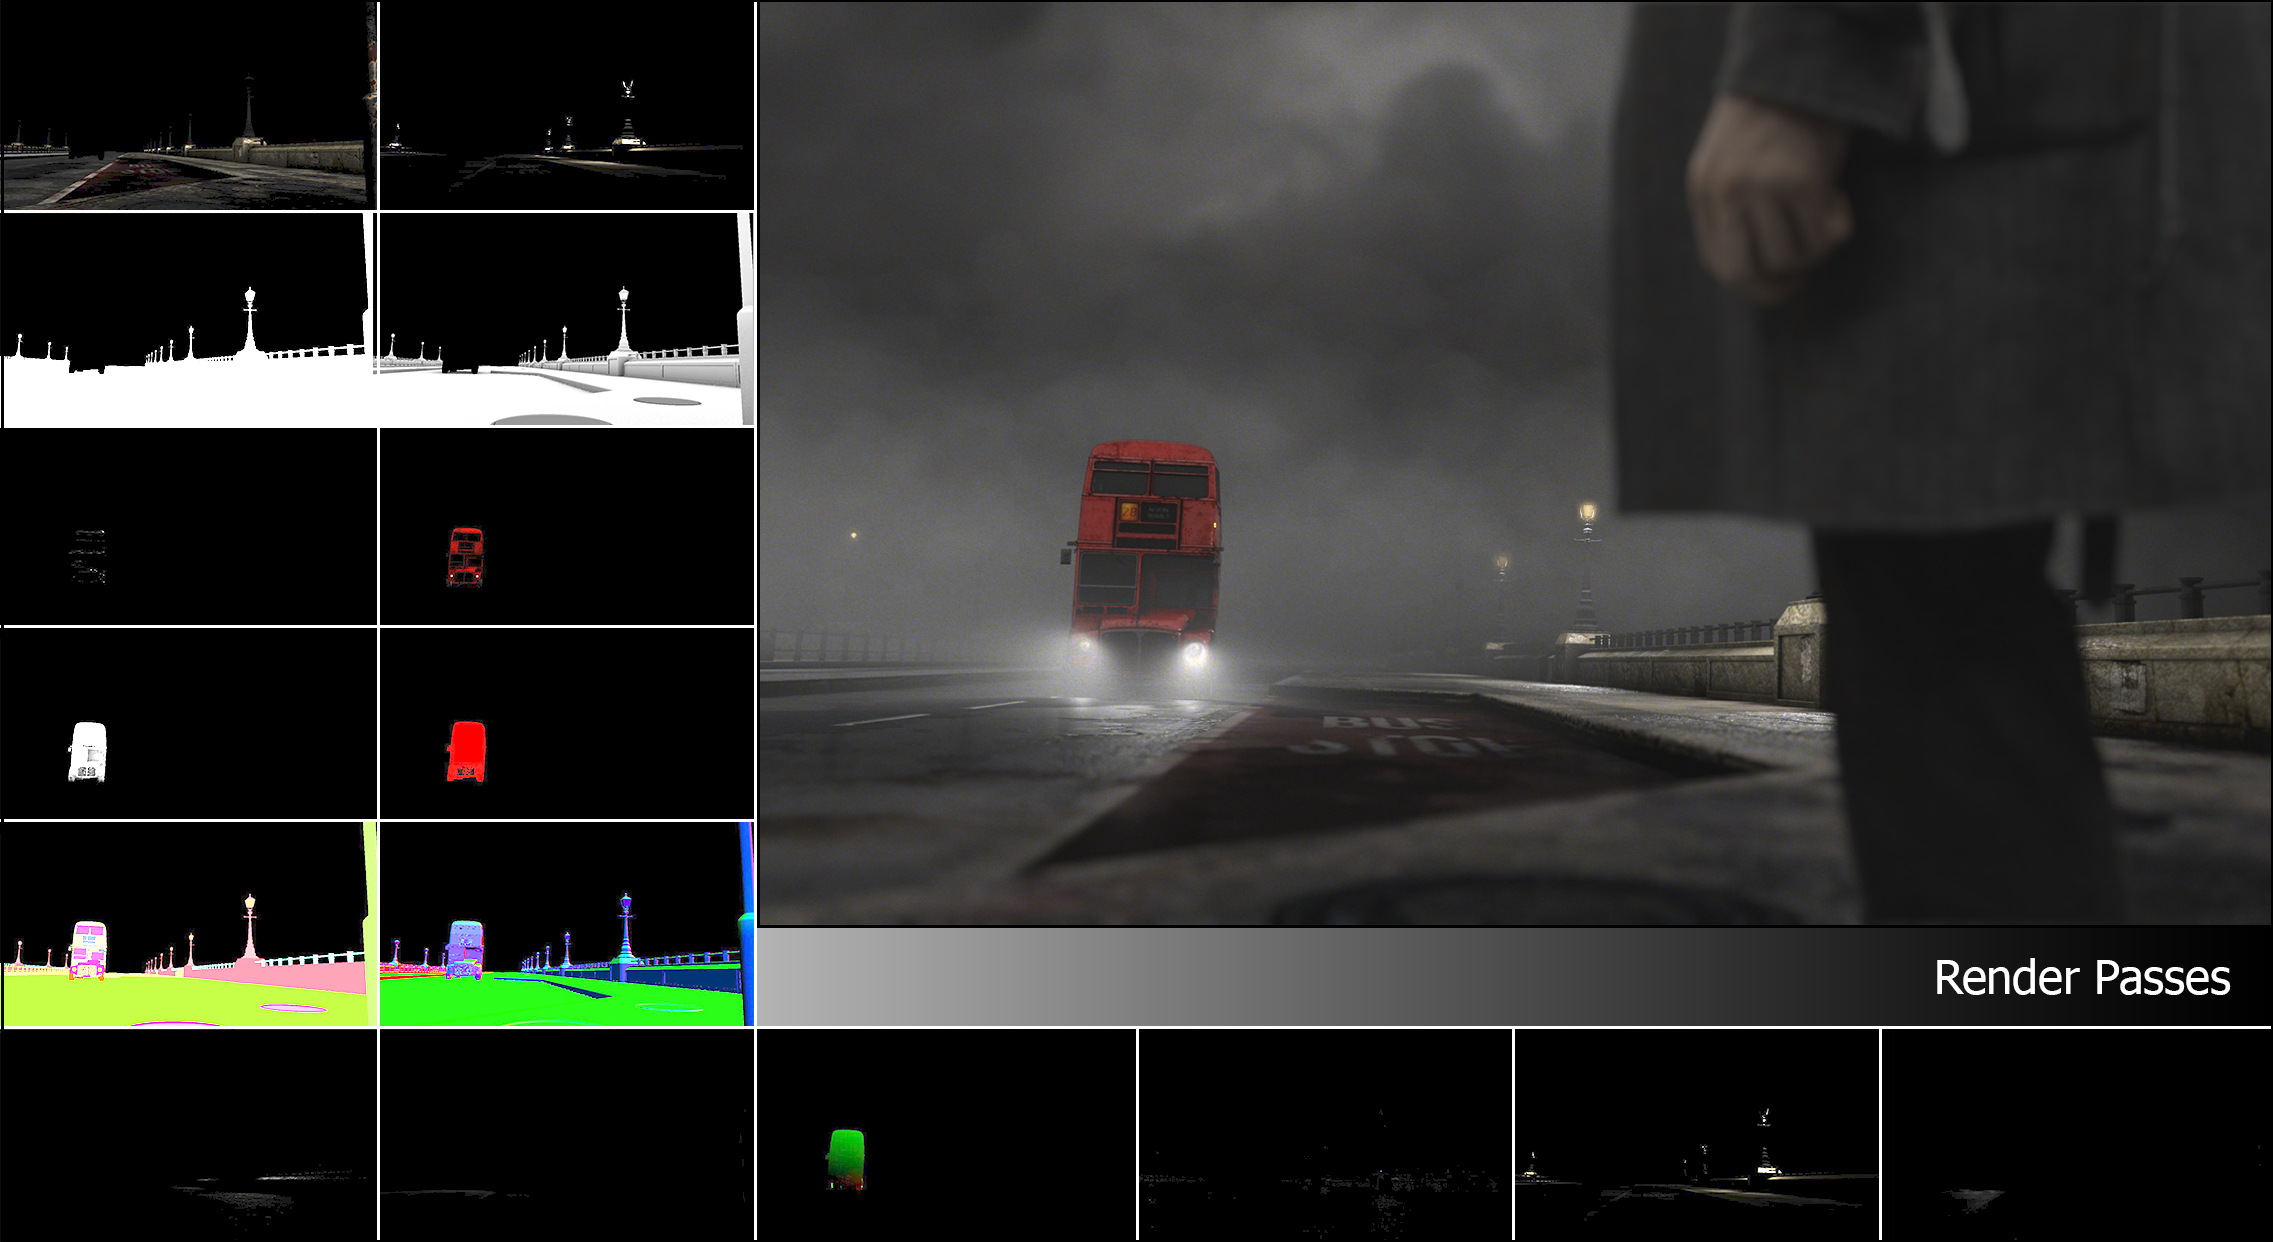
Render Passes
To give the compositors as much flexibility as I could, I separated the final shot in several passes giving them the possibility to tweak the final result and adapt it to the live footage.
I organized the scene so that the output from the batch render was 3 different render layers: the bridge, the bus and the fog. Yes the fog, I used Maya fluids to achieve fog that surrounded the bridge area, I preferred to start from a 3D fog instead of adding it in compositing because it gave me more control and a more natural look.
All the 3 render layers had a set of passes associated so that the compositor had the possibility to define and adapt every aspect of the final result ( lights, specular, reflections, refractions, shadows, occlusion pass, motion vectors, masks etc)
I separated even the lights contribution to the scene allowing a sort of “relight” in post production.